Fridge Door Part 3: Building a React Application
This article is part 3 in a multipart series that makes a message board using a Raspberry Pi and a Tidbyt.
Here are the parts in the series:
- Describe what we’re building (Part 1)
- Create a ReST service using Rocket (Part 2).
- Create a React application to both display and manage messages (this article).
- Integrate the ReST service and React application.
- Deploy the ReST service and React application to a Raspberry Pi.
- Create a Tidbyt application to display messages.
Prerequisites
Create the Application
In this part, we build a React application that makes service calls to the service from Part 2 to create and display messages. You can find more documentation about creating a React application here.
Open a terminal and type:
$ npx create-react-app fridge-door-web
$ cd fridge-door-web
You could run the boilerplate React app now, if you want, by typing npm start. Your project will compile, start, and launch a browser. You should see an image of an atom, slowly rotating, that looks like this:
Create the Pages
We are going to create two pages, in the sense that Single Page Applications (SPAs) can have more than one page, and route between them using React Router. These pages are:
- The message board, which displays messages
- The form for creating new messages
Stop your application by pressing <ctrl-c>. Add React Router as a dependency by typing:
$ npm install react-router-dom --saveThen, add support for its BrowserRouter by modifying index.js:
import React from 'react';
import ReactDOM from 'react-dom/client';
import { BrowserRouter } from 'react-router-dom';
import './index.css';
import App from './App';
import reportWebVitals from './reportWebVitals';

const root = ReactDOM.createRoot(document.getElementById('root'));
root.render(
  <React.StrictMode>
    <BrowserRouter>
      <App />
    </BrowserRouter>
  </React.StrictMode>
);

// If you want to start measuring performance in your app, pass a function
// to log results (for example: reportWebVitals(console.log))
// or send to an analytics endpoint. Learn more: https://bit.ly/CRA-vitals
reportWebVitals();
Most of that is the generated boilerplate. You just add an import for BrowserRouter and wrap the App tag in a BrowserRouter tag.
Create a directory called pages beneath the src directory to hold the code for the two pages. Inside the pages directory, create two files, MessageBoard.js and NewMessage.js, as shown below.
import React from 'react';
import { Link } from 'react-router-dom';

function MessageBoard() {
  return (
    <div>
      <h1>Message Board</h1>
      <Link to="/new">Add a message</Link>
    </div>
  );
}

export default MessageBoard;
import React from 'react';
import { Link } from 'react-router-dom';
function NewMessage() {
return (
<div>
<h1>New Message</h1>
<Link to="/">Back to message board</Link>
</div>
);
}
export default NewMessage;These pages don’t offer much yet: a title and a link to the other page, but we add content later. Now, we wire them up in App.js:
import React from 'react';
import { Routes, Route } from 'react-router-dom';
import MessageBoard from './pages/MessageBoard';
import NewMessage from './pages/NewMessage';
import './App.css';
function App() {
return (
<div className="App">
<Routes>
<Route path="/" element={<MessageBoard />} />
<Route path="/new" element={<NewMessage />} />
</Routes>
</div>
);
}
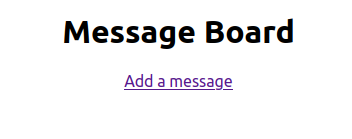
export default App;Run your application by typing npm start. You should see your Message Board page with an “Add a message” link. Click the link to see the New Message page.
Display Messages
We create a React component to display a message. Beneath your src directory, create a components directory and add a file called Message.js. It receives a message object and displays its text property. The code looks like this:
import React from 'react';
function Message({ message }) {
return (
<div>
{message.text}
</div>
);
}
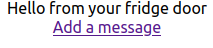
export default Message;To make sure this component works, open MessageBoard.js and import the Message component. Create a default message object so that, regardless of whether we retrieve message data from the service, we have something to show. Set up state to store the current message. Lastly, render the Message component. Your code now looks like this:
import React, { useState } from 'react';
import { Link } from 'react-router-dom';
import Message from '../components/Message';
function MessageBoard() {
const defaultMessage = { id: 0, text: "Hello from your fridge door" };
const [message, setMessage] = useState(defaultMessage);
return (
<>
<div><Message message={message} /></div>
<div>
<Link to="/new">Add a message</Link>
</div>
</>
);
}
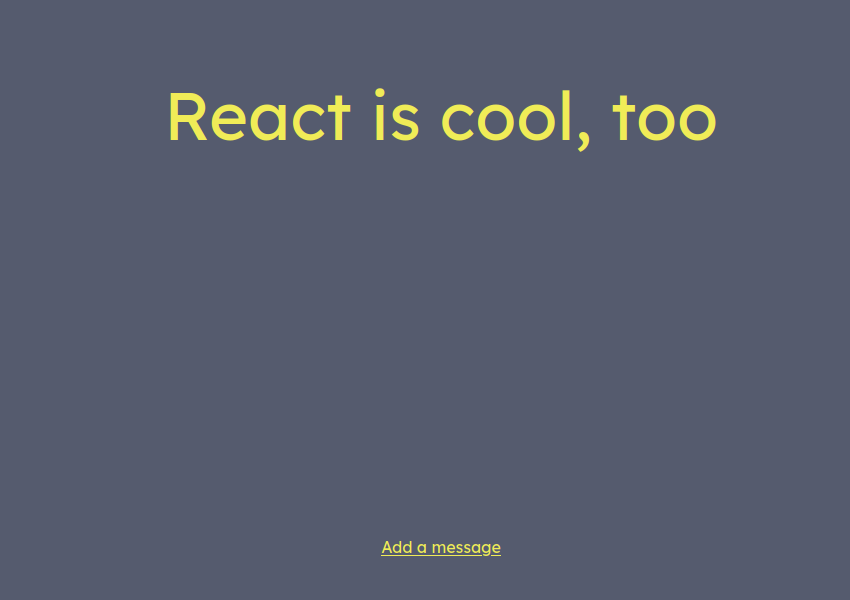
export default MessageBoard;Your page looks like this:
Add CORS Support to the Service
Before we proceed with the React app, we must update the service to allow Cross-Origin Resource Sharing (CORS). Adding this support will allow us to call the service running on port 8000 from our React app running on port 3000. You can read more about CORS here.
Return to your fridge-door directory and open main.rs. We use the rocket_cors package to add the CORS headers for us, allowing CORS for GET, POST, and OPTIONS requests. Your updated main.rs should look like this:
#[macro_use]
extern crate rocket;

use std::str::FromStr;

use rocket_cors::{AllowedOrigins, CorsOptions};

mod db;

#[get("/cors")]
fn cors() -> &'static str {
    "Hello, CORS!"
}

#[launch]
fn rocket() -> _ {
    let cors = CorsOptions::default()
        .allowed_origins(AllowedOrigins::all())
        .allowed_methods(
            vec!["Get", "Post", "Options"]
                .into_iter()
                .map(|s| FromStr::from_str(s).unwrap())
                .collect(),
        )
        .to_cors()
        .expect("error while building CORS");

    rocket::build()
        .mount("/", routes![cors])
        .attach(cors)
        .attach(db::stage())
}
Yes, I meant to do this in Part 2, but I forgot. Sorry. Restart your service using cargo run.
Retrieve Messages
We display the default message when someone first visits the page, but we want to display messages sourced from our service. We set a timer to fire every 15 seconds. When the timer fires, we use fetch to request one message — the message after the one we’re currently displaying. We use the since_id parameter to pass our current message’s ID. If we get no message back, we display our default message and reset the ID to 0. Make sure your service is running, add this code, and watch your messages change.
import React, { useEffect, useState } from 'react';

// existing code

  useEffect(() => {
    const interval = setInterval(async () => {
      await updateMessage();
    }, 15000);
    return () => clearInterval(interval);
  });

  const updateMessage = async () => {
    const msg = await getMessage();
    setMessage(msg ? msg : defaultMessage);
  };

  const getMessage = async () => {
    let response;
    try {
      response = await fetch(
        `http://127.0.0.1:8000/messages?count=1&since_id=${message.id}`,
        {
          mode: "cors",
        }
      );
    } catch (error) {
      console.error('Error:', error);
      return null;
    }

    let messages;
    try {
      messages = await response.json();
    } catch (error) {
      console.error('Error:', error);
      return null;
    }

    return messages.length > 0 ? messages[0] : null;
  };

// existing code
Every 15 seconds, you should see a new message. If your messages aren’t changing, check the console in your browser for any error messages. Also check that you have unexpired messages in your service database, and add some if you don’t.
Improve the Display
Your message board functions, albeit unattractively. Let’s add some CSS to make this message board pop. When we retrieve a new message from the service, we increment a simple counter. This counter corresponds to CSS classes that set fonts and 508-compliant colors. Open App.css, import some fonts from Google Fonts, and create some classes.
@import url('https://fonts.googleapis.com/css2?family=Montserrat');
@import url('https://fonts.googleapis.com/css2?family=Caveat');
@import url('https://fonts.googleapis.com/css2?family=Secular+One');
@import url('https://fonts.googleapis.com/css2?family=Permanent+Marker');
@import url('https://fonts.googleapis.com/css2?family=Lexend');
@import url('https://fonts.googleapis.com/css2?family=Patrick+Hand');

.App {
  text-align: center;
}

.Message-Board {
  background-color: #282c34;
  min-height: 90vh;
  display: flex;
  flex-direction: column;
  align-items: center;
  justify-content: center;
  font-size: calc(48px + 2vmin);
  color: white;
}

.Message-Board-Footer {
  min-height: 10vh;
}

.Message-Board-0 {
  background-color: #623b5a;
  color: #edafb8;
  font-family: Montserrat, sans-serif;
}

.Message-Board-0 a {
  color: #edafb8;
}

.Message-Board-1 {
  background-color: #e8ebf7;
  color: #00487c;
  font-family: Caveat, sans-serif;
}

.Message-Board-1 a {
  color: #00487c;
}

.Message-Board-2 {
  background-color: #93b48b;
  color: #111;
  font-family: 'Secular One', sans-serif;
}

.Message-Board-2 a {
  color: #111;
}

.Message-Board-3 {
  background-color: #423e28;
  color: #f1e9db;
  font-family: 'Permanent Marker', sans-serif;
}

.Message-Board-3 a {
  color: #f1e9db;
}

.Message-Board-4 {
  background-color: #555b6e;
  color: #f0ec57;
  font-family: 'Lexend', sans-serif;
}

.Message-Board-4 a {
  color: #f0ec57;
}

.Message-Board-5 {
  background-color: #66ced6;
  color: #283f3b;
  font-family: 'Patrick Hand', sans-serif;
}

.Message-Board-5 a {
  color: #283f3b;
}
We have six looks, numbered 0-5. Add a counter to MessageBoard.js that resets when it reaches the end, and add the classes to the div that hosts the Message component.
// existing code

  const maxCssIndex = 5;
  const [cssIndex, setCssIndex] = useState(0);

// existing code

  const updateMessage = async () => {
    const msg = await getMessage();
    setMessage(msg ? msg : defaultMessage);
    setCssIndex(cssIndex >= maxCssIndex ? 0 : cssIndex + 1);
  };

// existing code

  return (
    <>
      <div className={`Message-Board Message-Board-${cssIndex}`}>
        <Message message={message} /></div>
      <div className={`Message-Board-Footer Message-Board-${cssIndex}`}>
        <Link to="/new">Add a message</Link>
      </div>
    </>
  );

// existing code
Your React app should now show the Message Board in different colors and fonts.

Add the New Message Form
The final step to your React app is to build a simple form for adding a message. People can click the “Add a message” link to go to a screen with a text area and a Submit button to add a new message. First, add some CSS classes to App.css:
.New-Message {
  background-color: #282c34;
  min-height: 90vh;
  display: flex;
  flex-direction: column;
  align-items: center;
  justify-content: center;
  font-size: calc(48px + 2vmin);
  color: white;
}

.New-Message-Footer {
  background-color: #282c34;
  min-height: 10vh;
}

.New-Message-Footer a {
  color: white;
}
Then, update NewMessage.js to show a form and POST the message to your service on submit:
import React, { useState } from 'react';
import { Link } from 'react-router-dom';
function NewMessage() {
const [message, setMessage] = useState("");
const handleSubmit = async (e) => {
e.preventDefault();
try {
const response = await fetch("http://localhost:8000/messages", {
method: "POST",
mode: "cors",
headers: {
"Content-Type": "application/json",
},
body: JSON.stringify({
text: message,
})
});
if (response.ok) {
setMessage("");
}
} catch (error) {
console.error('Error:', error);
}
};
return (
<>
<div className="New-Message">
<form onSubmit={handleSubmit}>
<label>
Message:
<textarea value={message} onChange={(e) => setMessage(e.target.value)} rows="4" cols="60" />
</label>
<div>
<input type="submit" value="Submit" />
</div>
</form>
</div>
<div className="New-Message-Footer">
<Link to="/">Back to message board</Link>
</div>
</>
);
}
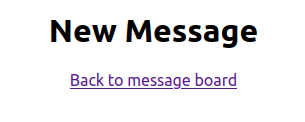
export default NewMessage;Click the link on your message board to view the form, which should look like this:
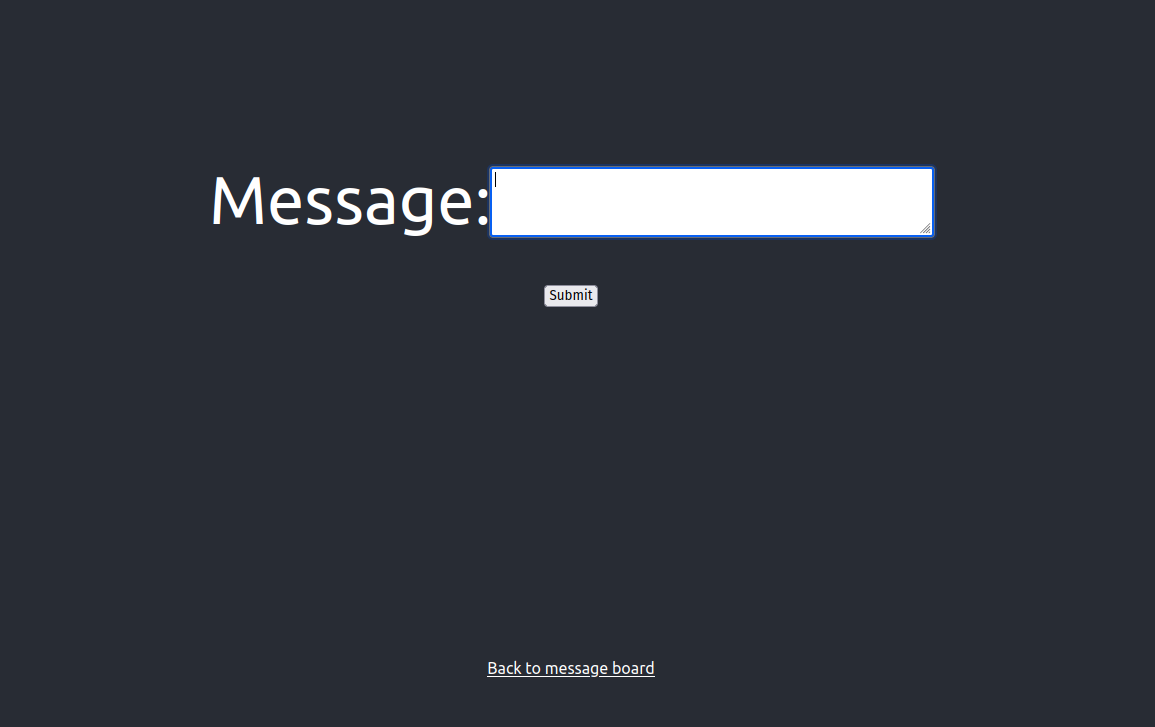
Enter a message and hit the Submit button. Click the link to return to your message board. Wait for your new message to appear.
Next Steps
We have a service that runs on port 8000, and a React app that runs on port 3000. The React app makes a ReST call to localhost:8000 to hit the service. This works well for development purposes, but not at all when we host both service and React app on a Raspberry Pi. In the next part in this series, we update our service to serve the React app, so that we can host both on a single endpoint, without any hard-coded host names or ports in the URLs.
2 Responses
[…] Create a React application to both display and manage messages (Part 3). […]
[…] Create a React application to both display and manage messages (Part 3). […]